Broom Finish Concrete: Outdated Look or Smart Move for Safety?
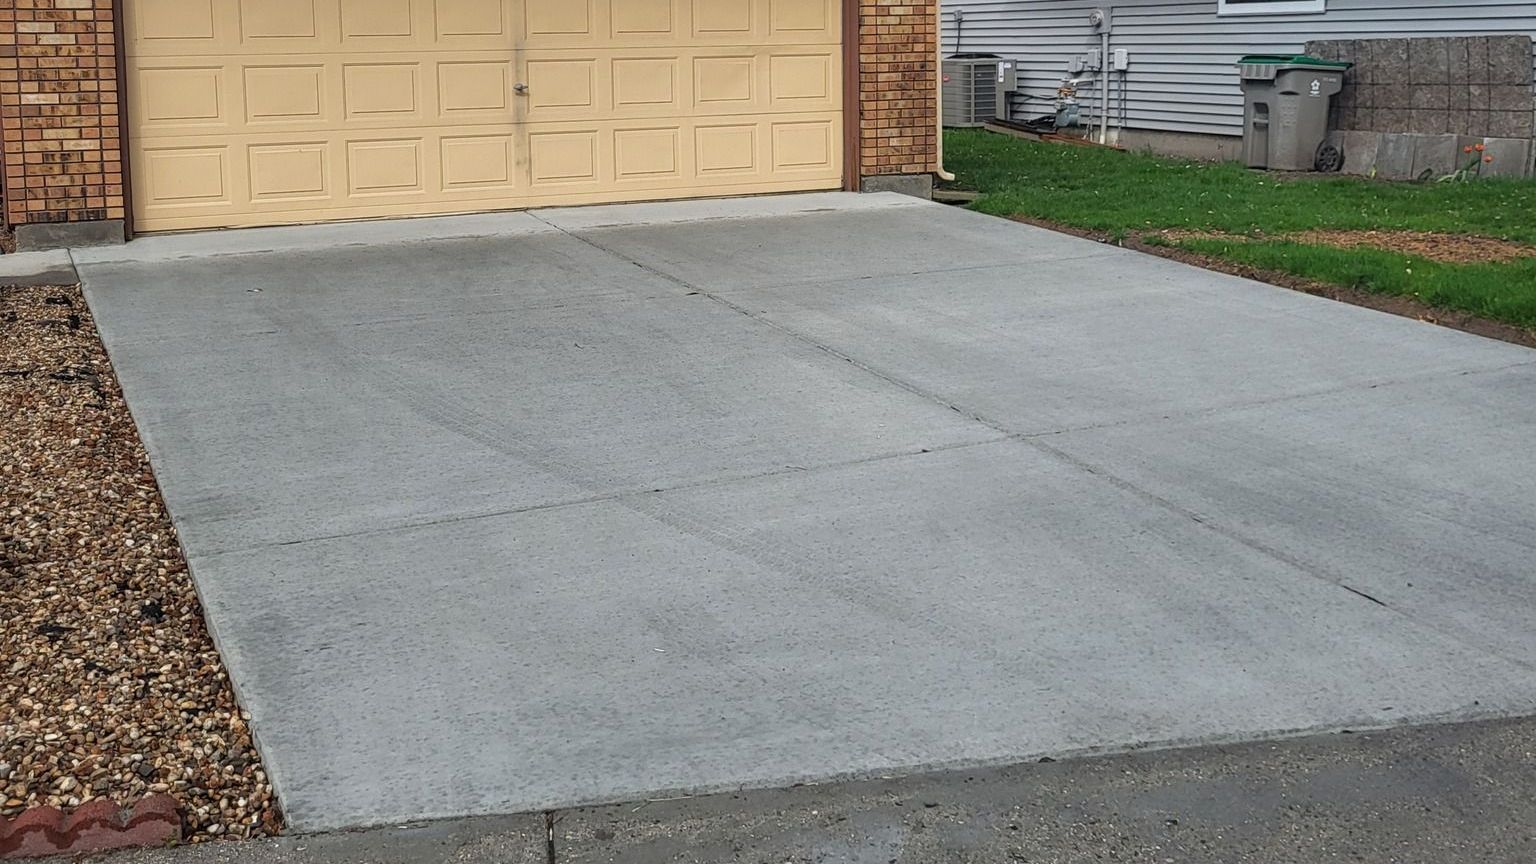
Broom Finishes: Broom finish concrete is a widely used technique that provides a slip-resistant surface, making it ideal for patios and driveways. This method involves using a broom to create texture on the concrete, enhancing safety and durability.
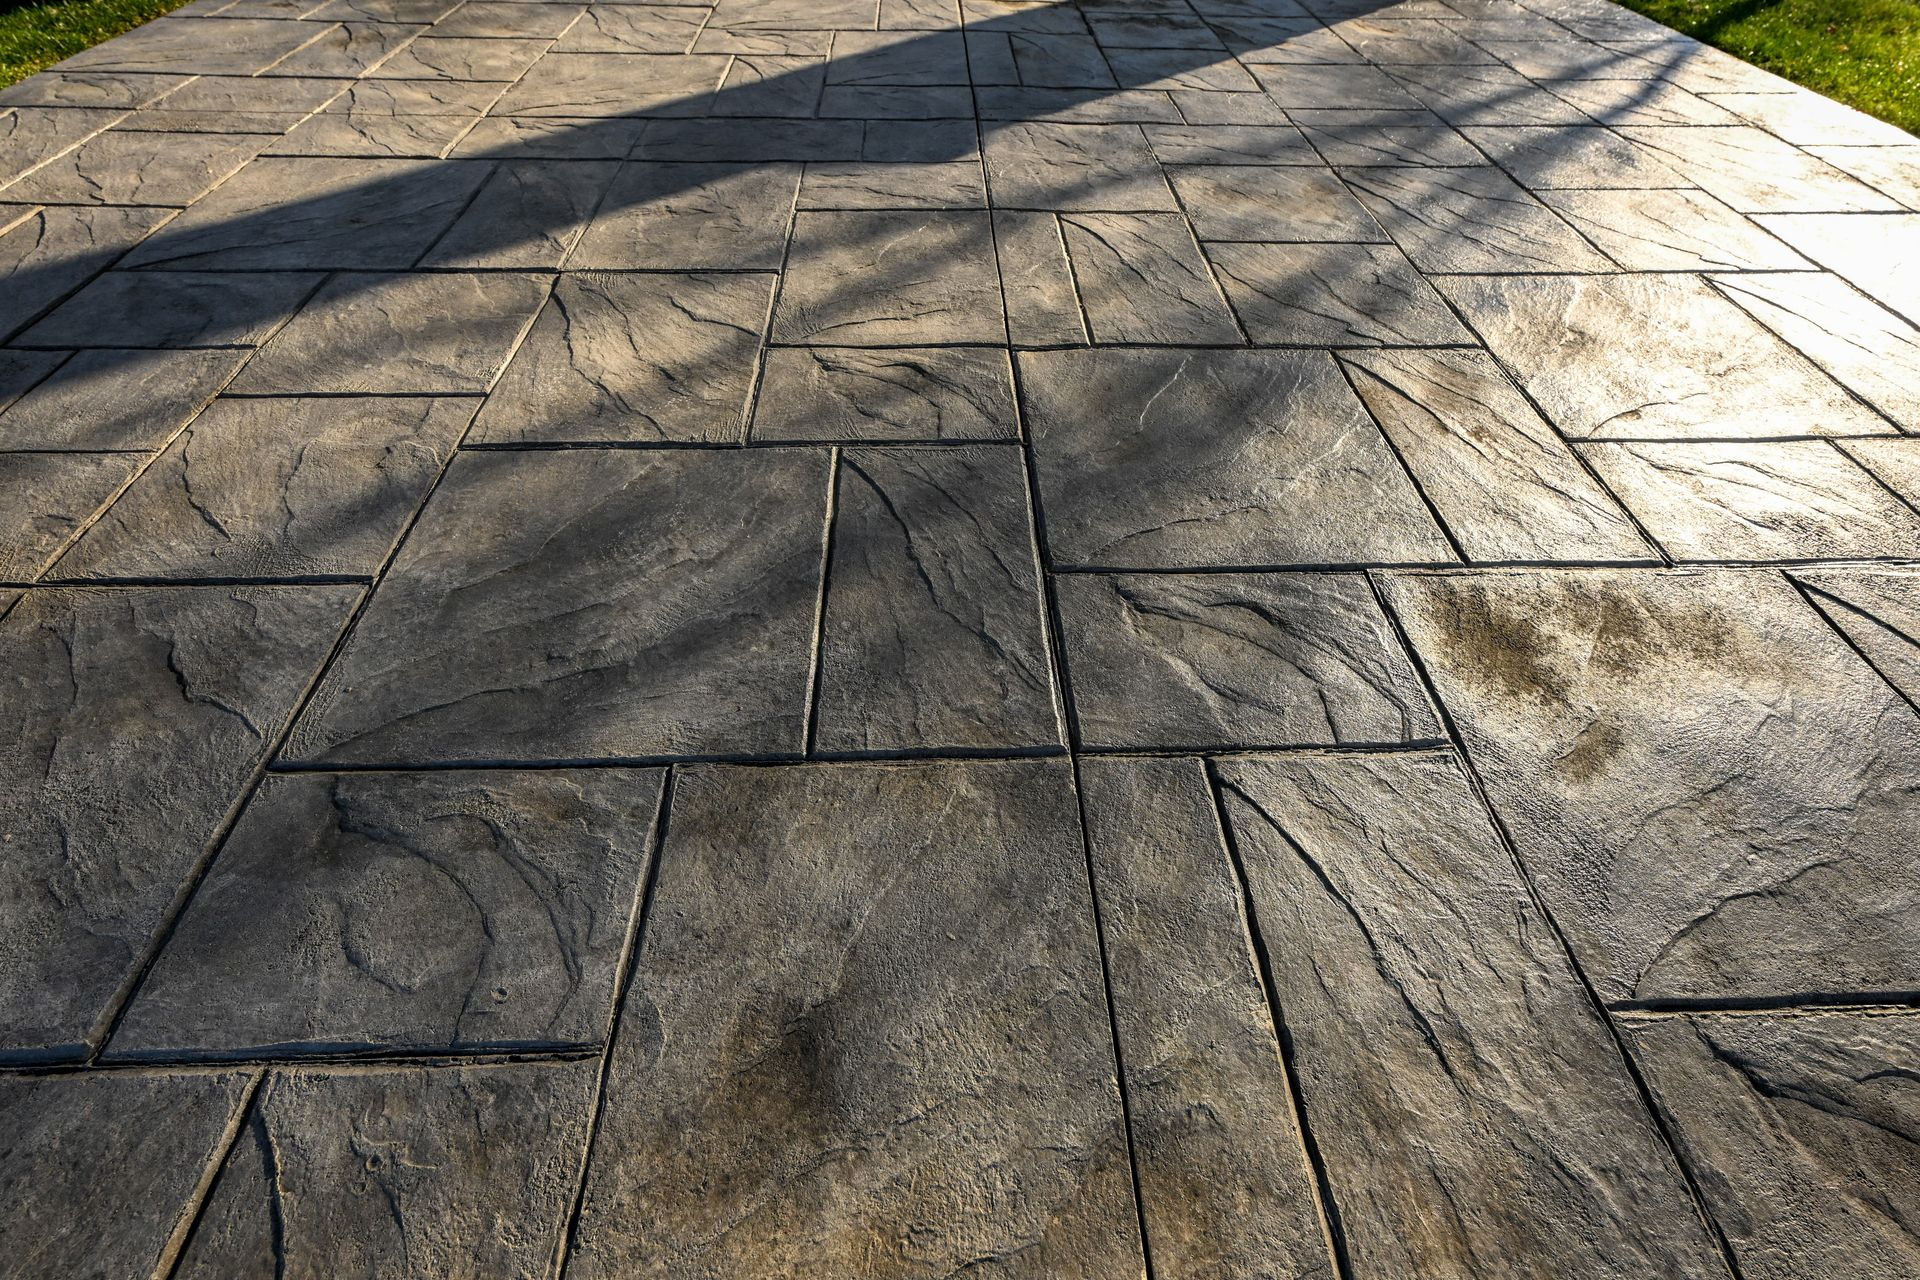
- Definition of Broom Finish: Broom finished concrete, also known as brushed concrete, is created by using a broom to add a slip-resistant texture to the surface. This technique has been in practice for many years
- Advantages: The key benefits of broom finish include slip resistance, affordability, ease of application, and durability.
- Disadvantages: However, broom finishes can be rough on bare feet, less decorative than other finishes, may trap dirt, and can cause color variations.
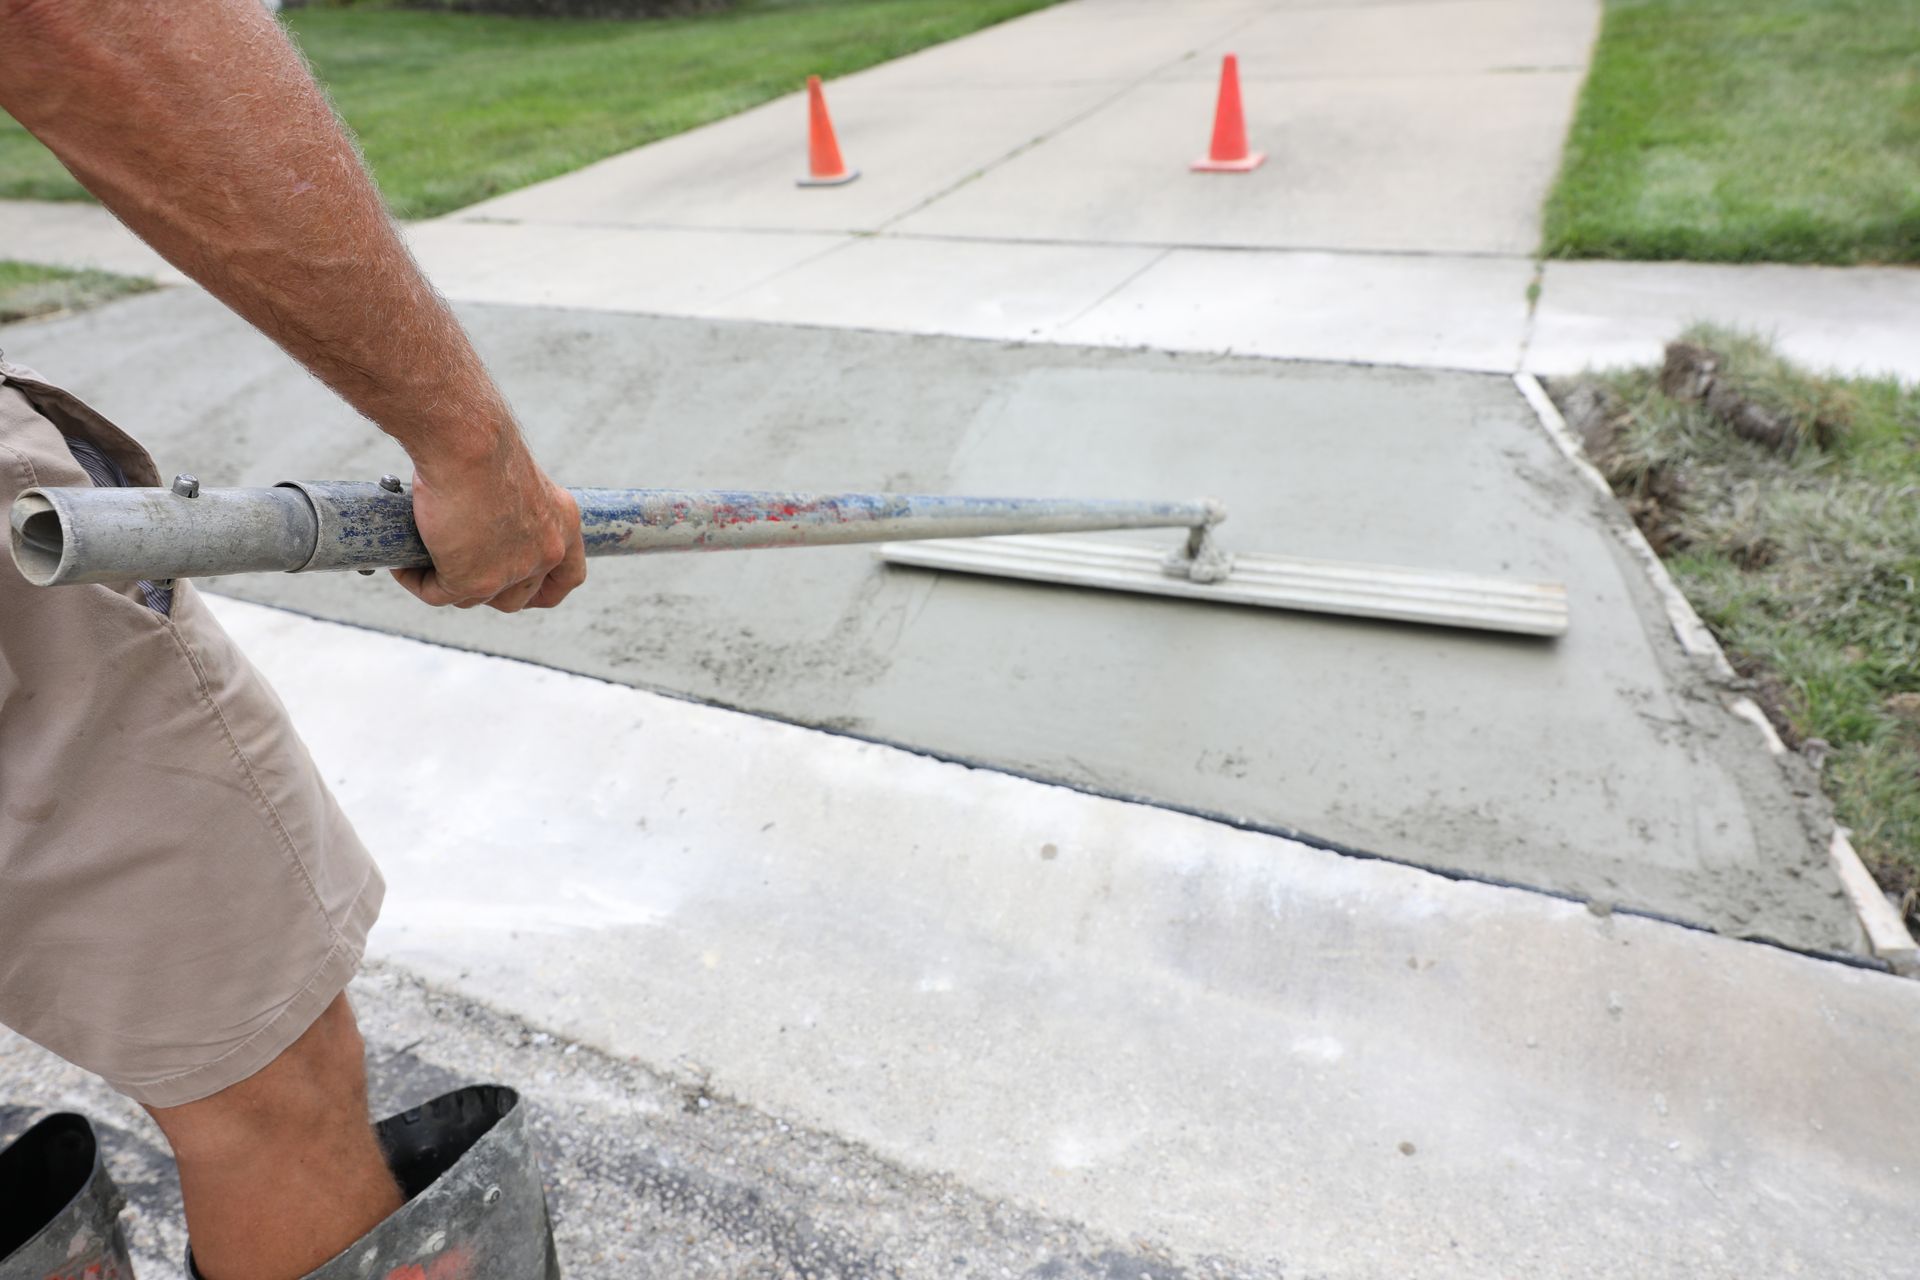
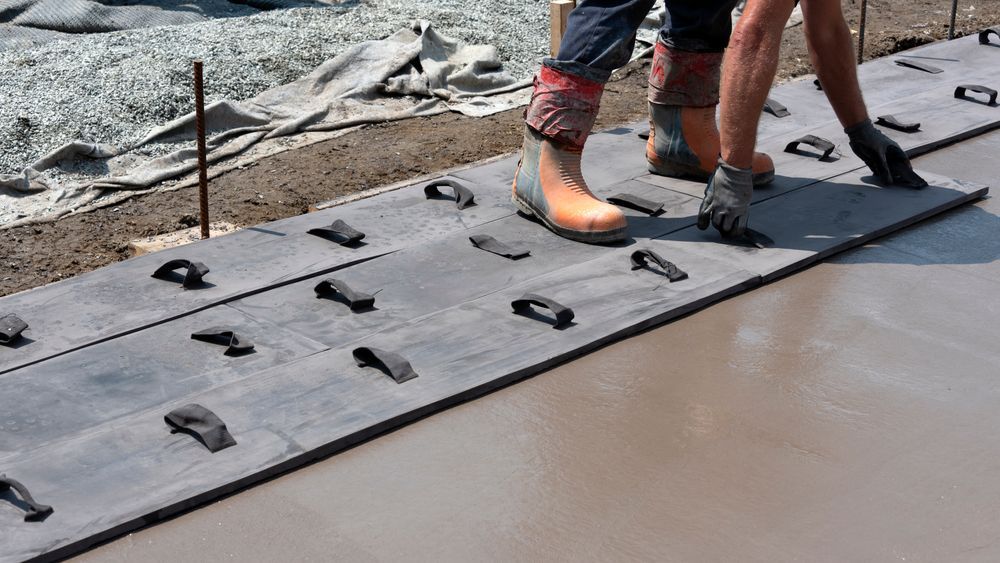
- Timing for Application: The timing of broom finishing is crucial; it should be done while the concrete slab is still soft, but after bleed water has evaporated, which can take 20 minutes to 4 hours depending on conditions.
- Brooming Process: The process involves pouring the slab, leveling it, allowing bleed water to evaporate, and then brooming the surface to create the texture. Proper curing is also essential.
- Broom Types: Various broom types are available, including those made from different materials and configurations, which can influence the texture and finish quality. Some innovative brooms even allow for adjustable textures.
Different Broom Finishes
Most the broom finishes are considered boring primary because it’s the most used concrete finish in the industry. It’s used in city sidewalks, parking lots and streets. What if I told there’s a broom finish that looks amazing and you could charge for the price as stamp concrete…
I call it a hexagon pattern. I typically use a four-foot broom to achieve the look. When done correctly the broom pattern will capture the light creating a interesting design.
Here is the technique:
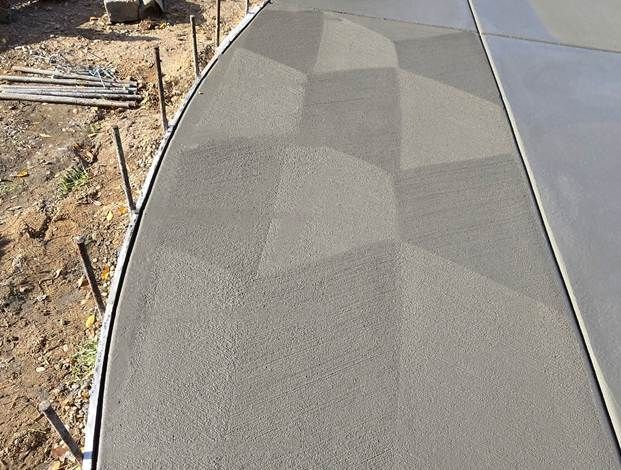

The pattern is created by using a four-foot broom like in the diagram broom”1”.
- Run the broom on a 45-degree angle till the far point on the broom hits one foot from the starting point.
- Keep the 45-degree broom texture square to maintain a straight line.
- Run the second broom pass like in the diagram broom “2”.
- Off set the second broom pattern one foot inside broom “1” like in the diagram.
- Make sure you keep an eye on the end of each 45degree pass to keep the lines straight.